# Create EKS cluster
Before starting with the main content, it's necessary to provision the Amazon EKS (opens new window) in AWS.
Use the MY_DOMAIN variable containing domain and LETSENCRYPT_ENVIRONMENT
variable.
The LETSENCRYPT_ENVIRONMENT variable should be one of:
staging- Let’s Encrypt will create testing certificate (not valid)production- Let’s Encrypt will create valid certificate (use with care)
export MY_DOMAIN=${MY_DOMAIN:-mylabs.dev}
export LETSENCRYPT_ENVIRONMENT=${LETSENCRYPT_ENVIRONMENT:-staging}
echo "${MY_DOMAIN} | ${LETSENCRYPT_ENVIRONMENT}"
# Prepare the local working environment
TIP
You can skip these steps if you have all the required software already installed.
Install necessary software:
test -x /usr/bin/apt && \
apt update -qq && \
DEBIAN_FRONTEND=noninteractive apt-get install -y -qq awscli curl docker.io freerdp-x11 gettext-base git gnupg2 jq ldap-utils openssh-client python3-pip sudo wget > /dev/null && \
pip3 install --quiet ansible boto3 pywinrm
Install kubectl (opens new window) binary:
if [ ! -x /usr/local/bin/kubectl ]; then
  sudo curl -s -Lo /usr/local/bin/kubectl https://storage.googleapis.com/kubernetes-release/release/$(curl -s https://storage.googleapis.com/kubernetes-release/release/stable.txt)/bin/linux/amd64/kubectl
  sudo chmod a+x /usr/local/bin/kubectl
fi
Install eksctl (opens new window):
if [ ! -x /usr/local/bin/eksctl ]; then
  curl -s -L "https://github.com/weaveworks/eksctl/releases/download/latest_release/eksctl_Linux_amd64.tar.gz" | sudo tar xz -C /usr/local/bin/
fi
Install AWS IAM Authenticator for Kubernetes (opens new window):
if [ ! -x /usr/local/bin/aws-iam-authenticator ]; then
  sudo curl -s -Lo /usr/local/bin/aws-iam-authenticator https://amazon-eks.s3-us-west-2.amazonaws.com/1.12.7/2019-03-27/bin/linux/amd64/aws-iam-authenticator
  sudo chmod a+x /usr/local/bin/aws-iam-authenticator
fi
# Configure AWS
Authorize to AWS using AWS CLI: Configuring the AWS CLI (opens new window)
aws configure
...
Create DNS zone:
aws route53 create-hosted-zone --name ${MY_DOMAIN} --caller-reference ${MY_DOMAIN}
Use your domain registrar to change the nameservers for your zone (for example "mylabs.dev") to use the Amazon Route 53 nameservers. Here is the way how you can find out the the Route 53 nameservers:
aws route53 get-hosted-zone --id $(aws route53 list-hosted-zones --query "HostedZones[?Name==\`${MY_DOMAIN}.\`].Id" --output text) --query "DelegationSet.NameServers"
Create policy allowing the cert-manager to change Route 53 settings. This will allow cert-manager to generate wildcard SSL certificates by Let's Encrypt certificate authority.
aws iam create-policy \
  --policy-name ${USER}-AmazonRoute53Domains-cert-manager \
  --description "Policy required by cert-manager to be able to modify Route 53 when generating wildcard certificates using Lets Encrypt" \
  --policy-document file://files/route_53_change_policy.json \
| jq
Output:
{
    "Policy": {
        "PolicyName": "pruzicka-AmazonRoute53Domains-cert-manager",
        "PolicyId": "xxxxxxxxxxxxxxxxxxxx",
        "Arn": "arn:aws:iam::822044714040:policy/pruzicka-AmazonRoute53Domains-cert-manager",
        "Path": "/",
        "DefaultVersionId": "v1",
        "AttachmentCount": 0,
        "IsAttachable": true,
        "CreateDate": "2019-06-05T11:16:58Z",
        "UpdateDate": "2019-06-05T11:16:58Z"
    }
}
Create user which will use the policy above allowing the cert-manager to change Route 53 settings:
aws iam create-user --user-name ${USER}-eks-cert-manager-route53 | jq && \
POLICY_ARN=$(aws iam list-policies --query "Policies[?PolicyName==\`${USER}-AmazonRoute53Domains-cert-manager\`].{ARN:Arn}" --output text) && \
aws iam attach-user-policy --user-name "${USER}-eks-cert-manager-route53" --policy-arn $POLICY_ARN && \
aws iam create-access-key --user-name ${USER}-eks-cert-manager-route53 > $HOME/.aws/${USER}-eks-cert-manager-route53-${MY_DOMAIN} && \
export EKS_CERT_MANAGER_ROUTE53_AWS_ACCESS_KEY_ID=$(awk -F\" "/AccessKeyId/ { print \$4 }" $HOME/.aws/${USER}-eks-cert-manager-route53-${MY_DOMAIN}) && \
export EKS_CERT_MANAGER_ROUTE53_AWS_SECRET_ACCESS_KEY=$(awk -F\" "/SecretAccessKey/ { print \$4 }" $HOME/.aws/${USER}-eks-cert-manager-route53-${MY_DOMAIN})
Output:
{
    "User": {
        "Path": "/",
        "UserName": "pruzicka-eks-cert-manager-route53",
        "UserId": "xxxxxxxxxxxxxxxxxxxx",
        "Arn": "arn:aws:iam::822044714040:user/pruzicka-eks-cert-manager-route53",
        "CreateDate": "2019-06-05T11:16:59Z"
    }
}
The AccessKeyId and SecretAccessKey is need for creating the ClusterIssuer
definition for cert-manager.
# Create Amazon EKS

Generate SSH keys if not exists:
test -f $HOME/.ssh/id_rsa || ( install -m 0700 -d $HOME/.ssh && ssh-keygen -b 2048 -t rsa -f $HOME/.ssh/id_rsa -q -N "" )
Clone the k8s-harbor (opens new window) Git repository if it wasn't done already:
[ ! -d .git ] && git clone --quiet https://github.com/ruzickap/k8s-harbor && cd k8s-harbor
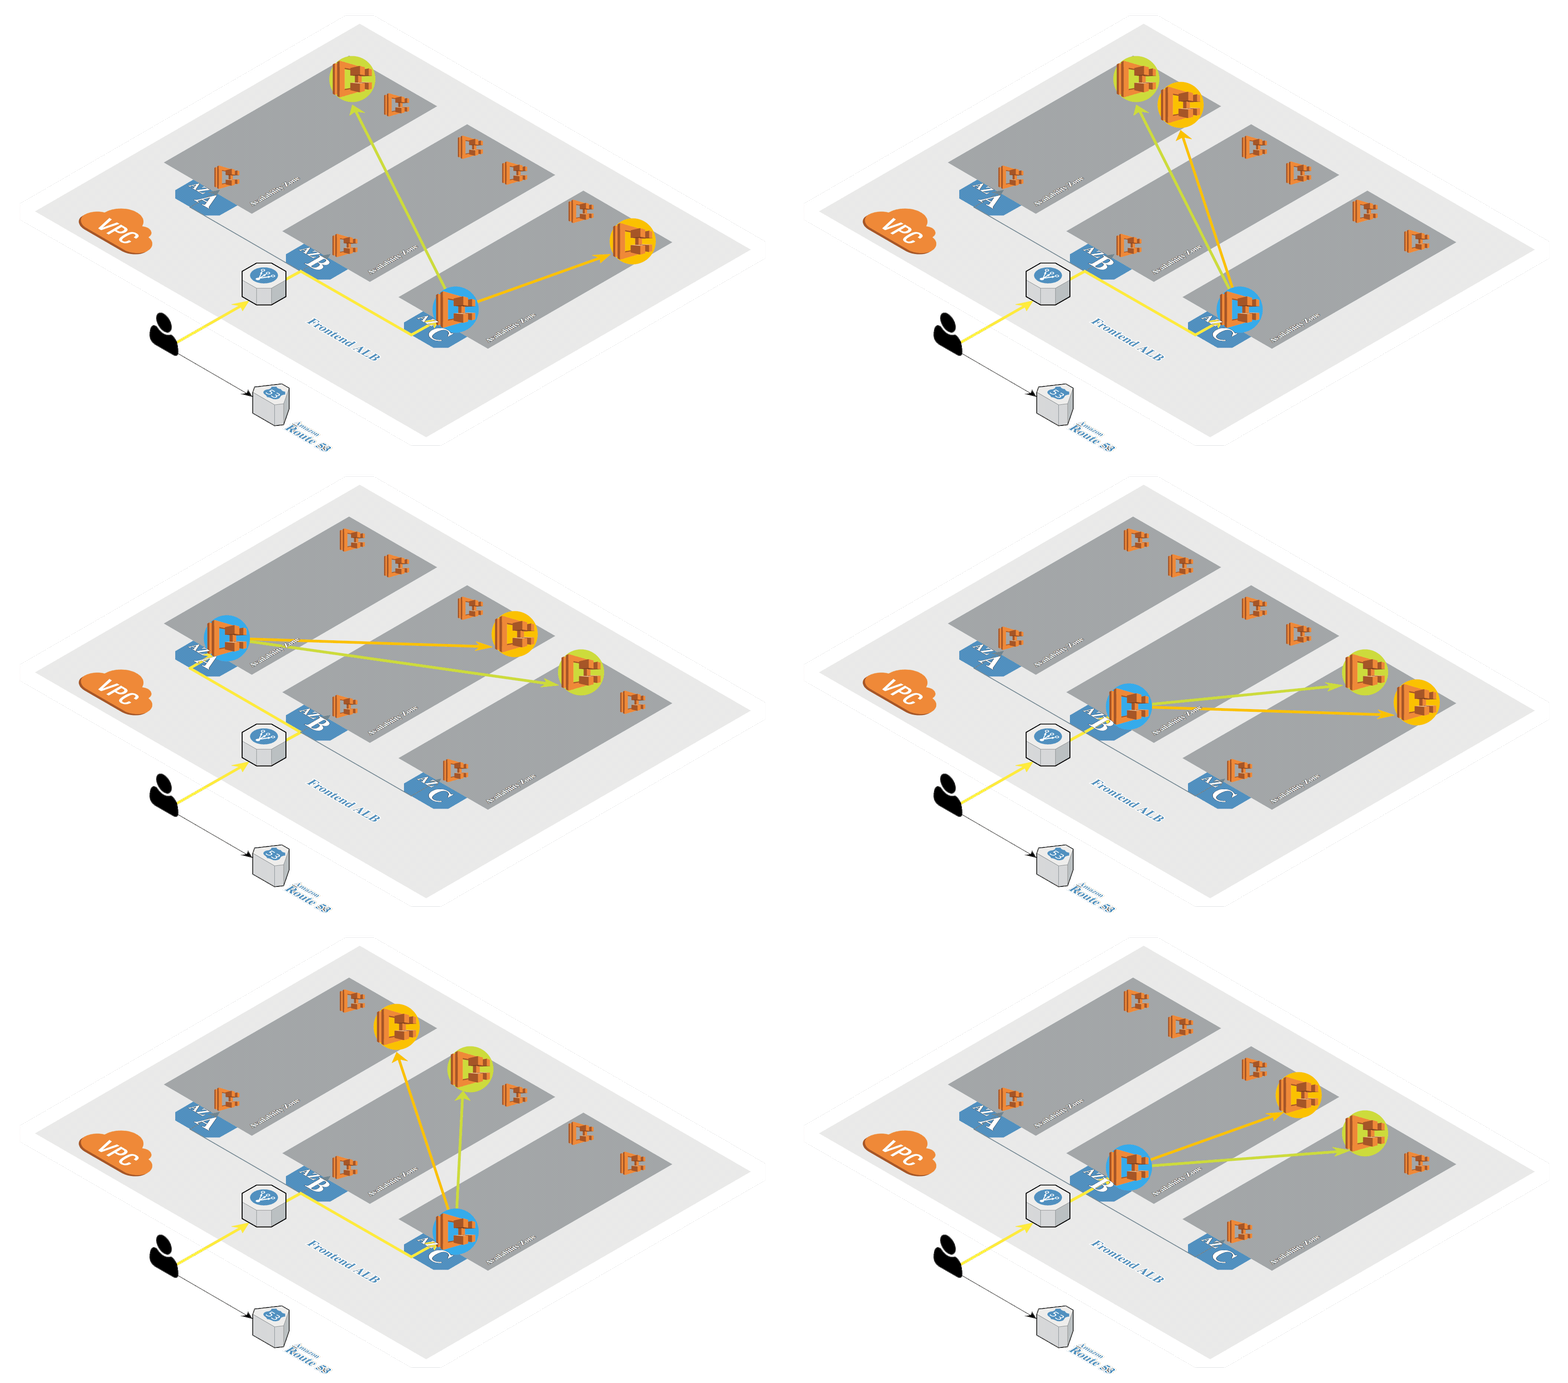
Create Amazon EKS (opens new window) in AWS by using eksctl (opens new window). It's a tool from Weaveworks based on official AWS CloudFormation templates which will be used to launch and configure our EKS cluster and nodes.

eksctl create cluster \
--name=${USER}-k8s-harbor \
--tags "Application=Harbor,Owner=${USER},Environment=Test,Division=Services" \
--region=eu-central-1 \
--node-type=t3.large \
--ssh-access \
--ssh-public-key $HOME/.ssh/id_rsa.pub \
--node-ami=auto \
--node-labels "Application=Harbor,Owner=${USER},Environment=Test,Division=Services" \
--kubeconfig=kubeconfig.conf
Output:
[ℹ]  using region eu-central-1
[ℹ]  setting availability zones to [eu-central-1c eu-central-1b eu-central-1a]
[ℹ]  subnets for eu-central-1c - public:192.168.0.0/19 private:192.168.96.0/19
[ℹ]  subnets for eu-central-1b - public:192.168.32.0/19 private:192.168.128.0/19
[ℹ]  subnets for eu-central-1a - public:192.168.64.0/19 private:192.168.160.0/19
[ℹ]  nodegroup "ng-d1b535b2" will use "ami-0b7127e7a2a38802a" [AmazonLinux2/1.13]
[ℹ]  using SSH public key "/home/pruzicka/.ssh/id_rsa.pub" as "eksctl-pruzicka-k8s-harbor-nodegroup-ng-d1b535b2-a3:84:e4:0d:af:5f:c8:40:da:71:68:8a:74:c7:ba:16"
[ℹ]  using Kubernetes version 1.13
[ℹ]  creating EKS cluster "pruzicka-k8s-harbor" in "eu-central-1" region
[ℹ]  will create 2 separate CloudFormation stacks for cluster itself and the initial nodegroup
[ℹ]  if you encounter any issues, check CloudFormation console or try 'eksctl utils describe-stacks --region=eu-central-1 --name=pruzicka-k8s-harbor'
[ℹ]  2 sequential tasks: { create cluster control plane "pruzicka-k8s-harbor", create nodegroup "ng-d1b535b2" }
[ℹ]  building cluster stack "eksctl-pruzicka-k8s-harbor-cluster"
[ℹ]  deploying stack "eksctl-pruzicka-k8s-harbor-cluster"
[ℹ]  building nodegroup stack "eksctl-pruzicka-k8s-harbor-nodegroup-ng-d1b535b2"
[ℹ]  --nodes-min=2 was set automatically for nodegroup ng-d1b535b2
[ℹ]  --nodes-max=2 was set automatically for nodegroup ng-d1b535b2
[ℹ]  deploying stack "eksctl-pruzicka-k8s-harbor-nodegroup-ng-d1b535b2"
[✔]  all EKS cluster resource for "pruzicka-k8s-harbor" had been created
[✔]  saved kubeconfig as "kubeconfig.conf"
[ℹ]  adding role "arn:aws:iam::822044714040:role/eksctl-pruzicka-k8s-harbor-nodegr-NodeInstanceRole-A4XWMWDV73D9" to auth ConfigMap
[ℹ]  nodegroup "ng-d1b535b2" has 0 node(s)
[ℹ]  waiting for at least 2 node(s) to become ready in "ng-d1b535b2"
[ℹ]  nodegroup "ng-d1b535b2" has 2 node(s)
[ℹ]  node "ip-192-168-56-161.eu-central-1.compute.internal" is ready
[ℹ]  node "ip-192-168-9-2.eu-central-1.compute.internal" is ready
[ℹ]  kubectl command should work with "kubeconfig.conf", try 'kubectl --kubeconfig=kubeconfig.conf get nodes'
[✔]  EKS cluster "pruzicka-k8s-harbor" in "eu-central-1" region is ready
Create CloudFormation stack with Windows Server 2016, which will serve as Active Directory to use LDAP connection from Harbor:
ansible-playbook --connection=local -i "127.0.0.1," files/ansible/aws_windows_server_2016.yml
Output:
...
PLAY RECAP *********************************************************************
127.0.0.1                  : ok=6    changed=1    unreachable=0    failed=0    skipped=0    rescued=0    ignored=0
winad01.mylabs.dev         : ok=22   changed=8    unreachable=0    failed=0    skipped=0    rescued=0    ignored=0
You should be able to access Windows Server using RDP:
xfreerdp /u:Administrator /p:really_long_secret_windows_password /size:1440x810 -wallpaper /cert-ignore /dynamic-resolution /v:winad01.${MY_DOMAIN} &> /dev/null &
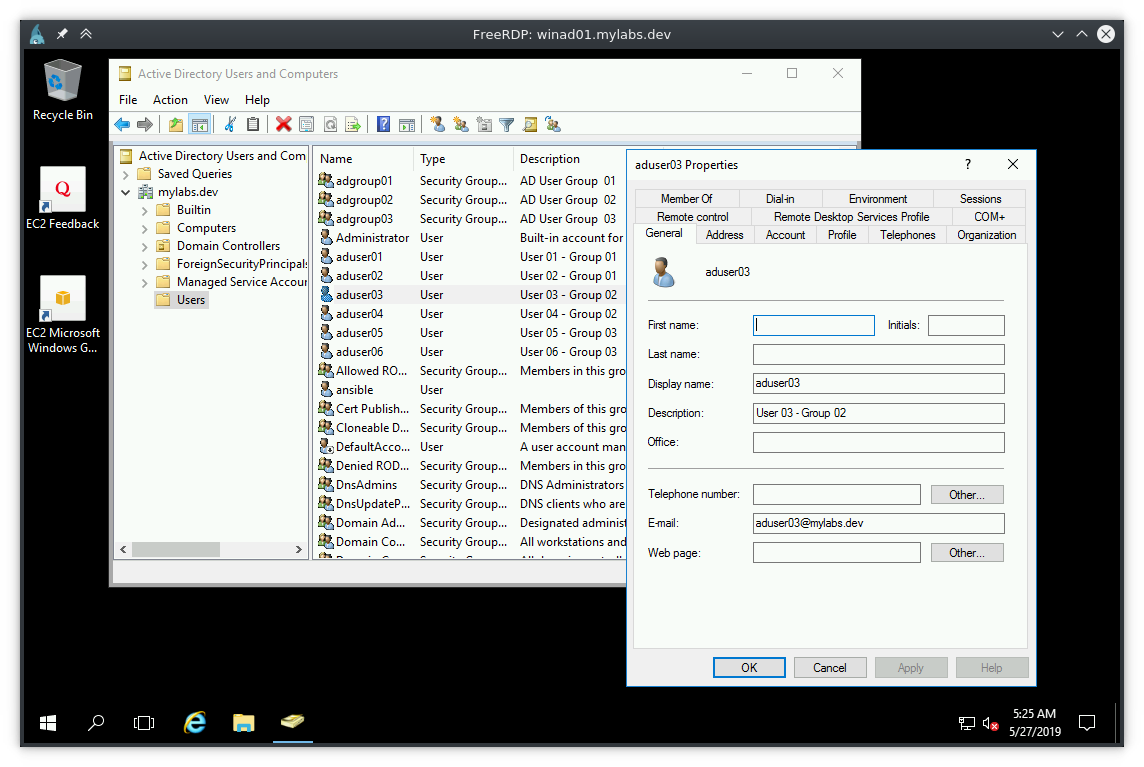
Windows desktop should appear:

If you check the AD Users you should see users aduser{01..06} distributed into
three groups adgroup{01.03} with password admin.
Check if the new EKS cluster is available:
export KUBECONFIG=$PWD/kubeconfig.conf
kubectl get nodes -o wide
Output:
NAME                                              STATUS   ROLES    AGE   VERSION              INTERNAL-IP      EXTERNAL-IP     OS-IMAGE         KERNEL-VERSION                  CONTAINER-RUNTIME
ip-192-168-56-161.eu-central-1.compute.internal   Ready    <none>   46m   v1.13.7-eks-c57ff8   192.168.56.161   54.93.96.15     Amazon Linux 2   4.14.128-112.105.amzn2.x86_64   docker://18.6.1
ip-192-168-9-2.eu-central-1.compute.internal      Ready    <none>   46m   v1.13.7-eks-c57ff8   192.168.9.2      18.196.16.153   Amazon Linux 2   4.14.128-112.105.amzn2.x86_64   docker://18.6.1
Both worker nodes should be accessible via SSH:
for EXTERNAL_IP in $(kubectl get nodes --output=jsonpath="{.items[*].status.addresses[?(@.type==\"ExternalIP\")].address}"); do
  echo "*** ${EXTERNAL_IP}"
  ssh -q -n -o StrictHostKeyChecking=no -l ec2-user ${EXTERNAL_IP} uptime
done
Output:
*** 54.93.96.15
 10:16:43 up 48 min,  0 users,  load average: 1.03, 0.47, 0.25
*** 18.196.16.153
 10:16:43 up 48 min,  0 users,  load average: 0.64, 0.91, 0.61
At the end of the output you should see 2 IP addresses which
should be accessible by SSH using your public key ~/.ssh/id_rsa.pub.


