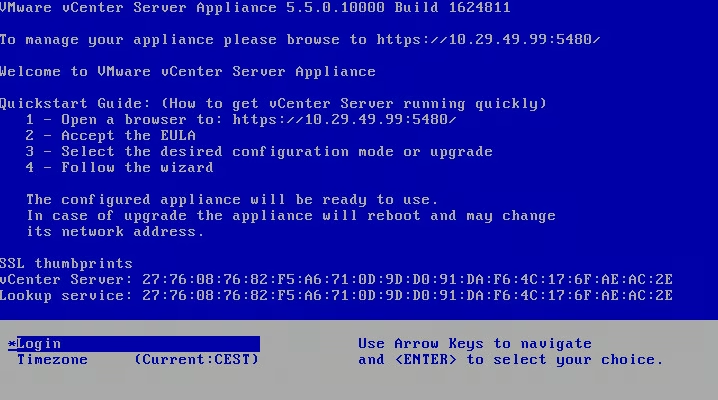
VMware vCenter Server 5.x Appliance installation and configuration using ssh command line
VMware vCenter Server 5.x Appliance installation and configuration using ssh command line
Original post from linux.xvx.cz
Here you can find some notes about installing VMware vCenter Appliance from command line directly from ESXi using OVF Tool.
Install the OVF tools first. Details can be found here: https://www.virtuallyghetto.com/2012/05/how-to-deploy-ovfova-in-esxi-shell.html.
1
2
3
4
5
6
7
8
9
#Download OVF tools
wget -q ftp://ftp.example.com/software/vmware/installation_scripts/vmware-ovftool.tar.gz -O /vmfs/volumes/My_Datastore/vmware-ovftool.tar.gz

# Extract ovftool content to /vmfs/volumes/My_Datastore
tar -xzf /vmfs/volumes/My_Datastore/vmware-ovftool.tar.gz -C /vmfs/volumes/My_Datastore/
rm /vmfs/volumes/My_Datastore/vmware-ovftool.tar.gz

# Modify the ovftool script to work on ESXi
sed -i 's@^#!/bin/bash@#!/bin/sh@' /vmfs/volumes/My_Datastore/vmware-ovftool/ovftool
Provision VMware vCenter Server 5.x Appliance using OVFtool directly to ESXi and then configure it via SSH:
1
2
3
4
5
6
7
8
9
10
11
12
13
14
15
16
17
18
19
20
21
22
23
24
25
26
27
28
29
30
31
32
33
34
35
36
37
38
39
40
41
42
43
44
45
46
47
48
49
50
51
52
53
54
55
56
57
58
59
60
61
# Deploy OVF from remote HTTP source
/vmfs/volumes/My_Datastore/vmware-ovftool/ovftool --diskMode=thin --datastore=My_Datastore --noSSLVerify --acceptAllEulas --skipManifestCheck "--net:Network 1=VMware Management Network" --prop:vami.ip0.VMware_vCenter_Server_Appliance=10.29.49.99 --prop:vami.netmask0.VMware_vCenter_Server_Appliance=255.255.255.128 --prop:vami.gateway.VMware_vCenter_Server_Appliance=10.29.49.1 --prop:vami.DNS.VMware_vCenter_Server_Appliance=10.1.1.44 --prop:vami.hostname=vcenter.example.com "ftp://ftp.example.com/software/vmware/VMware-vCenter-Server-Appliance-5.5.0.10000-1624811_OVF10.ova" "vi://root:mypassword@127.0.0.1"

echo "Accepting EULA ..."
/usr/sbin/vpxd_servicecfg eula accept
echo "Configuring Embedded DB ..."
/usr/sbin/vpxd_servicecfg db write embedded
echo "Configuring SSO..."
/usr/sbin/vpxd_servicecfg sso write embedded
echo "Starting VCSA ..."
/usr/sbin/vpxd_servicecfg service start

echo "Configure NTP"
/usr/sbin/vpxd_servicecfg timesync write ntp ntp.example.com
echo "Set Proxy Server"
/opt/vmware/share/vami/vami_set_proxy px01.example.com 3128

# Password change
echo rootpassword | passwd --stdin

# Add user admin
useradd admin
echo admin123 | passwd --stdin admin
chage -M -1 -E -1 admin

# If you wish to completely disable account password expiry, you can do so by running the following command:
chage -M -1 -E -1 root

echo "Configure Network Settings"
/opt/vmware/share/vami/vami_set_dns 10.0.0.44 10.0.0.45
/opt/vmware/share/vami/vami_set_hostname vcenter.example.com
/opt/vmware/share/vami/vami_set_timezone_cmd Europe/Prague

# Regenerate all certificates next reboot
echo only-once > /etc/vmware-vpx/ssl/allow_regeneration

# Add SSH key
mkdir /root/.ssh
wget ftp://ftp.example.com/ssh_keys/id_dsa.pub -O /root/.ssh/authorized_keys
chmod 755 /root/.ssh
chmod 600 /root/.ssh/authorized_keys

# Install SuSe repositories
zypper --gpg-auto-import-keys ar http://download.opensuse.org/distribution/11.1/repo/oss/ 11.1
zypper --gpg-auto-import-keys ar http://download.opensuse.org/update/11.1/ Update-11.1
rm /etc/zypp/repos.d/Update-11.1.repo
zypper --no-gpg-checks refresh

# Install MC :-)
zypper install -y mc

# Disable mouse support in MC
sed -i 's@/usr/bin/mc@/usr/bin/mc --nomouse@' /usr/share/mc/bin/mc-wrapper.sh

(
  sleep 10
  reboot
) &

# Set static IP
/opt/vmware/share/vami/vami_set_network eth0 STATICV4 10.0.0.99 255.255.255.128 10.0.0.1
Then you can automatically register the ESXi servers to the vCenter using joinvCenter.py. Details here https://www.virtuallyghetto.com/2011/03/how-to-automatically-add-esxi-host-to.html.
Thank you guys from the virtuallyGhetto for their awesome blog full of great “VMware ideas”.